Rejuvenate Your Skin Without Needles or Pain

HydraFacial for Anti-Aging: Rejuvenate Your Skin Without Needles or Pain

When it comes to non-surgical anti-aging treatments, HydraFacial has emerged as the gold standard for those seeking visible results—without needles, discomfort, or downtime. This treatment has become a favorite not only among Hollywood celebrities, but also busy professionals and anyone in need of quick, yet highly effective skincare.

So why is the anti-aging HydraFacial such a great choice in the fight against visible signs of aging? How does it work—and what kind of results can you expect after just one session?

Why Skin Ages—And Why It Shows

The natural production of collagen and elastin—two essential proteins responsible for the skin’s firmness and elasticity—begins to decline as early as our mid-twenties. At the same time, external factors like UV exposure, pollution, stress, smoking, and poor nutrition further accelerate the loss of skin tone and the appearance of fine lines.

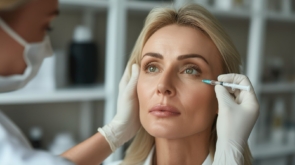
The first visible signs of aging often include fine lines around the eyes and lips, uneven skin tone, dehydration, and mild skin laxity. Traditional anti-aging solutions often involve injectables (such as mesotherapy, dermal fillers, or PRP), lasers, or aggressive chemical peels. While effective, these options usually require downtime and can carry the risk of irritation or unwanted side effects.

What Is the Anti-Aging Version of HydraFacial?

HydraFacial treatments can be customized in a variety of ways depending on the specific goals for your skin.

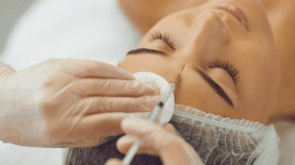
The classic HydraFacial is known for its ‘three steps to glowing skin’: cleansing, extraction, and hydration. When tailored for anti-aging purposes, the treatment includes an extended protocol enriched with specialized booster serums packed with peptides, antioxidants, and hyaluronic acid in multiple molecular weights.

This results in intense stimulation of fibroblasts—the cells responsible for collagen production—without causing mechanical damage to the skin. The outcome is a noticeable lifting and rejuvenating effect, with minimal discomfort and no redness lasting beyond a few hours.

The Advantages of HydraFacial Technology

What sets HydraFacial apart from other treatments is its ability to revitalize the skin without the need for invasive techniques typically associated with cosmetic procedures.

This effectiveness is largely due to the advanced technological features of the device, with one in particular standing out:

Vortex-Fusion Technology

The hallmark of the HydraFacial treatment lies in its patented Vortex-Fusion technology. The device features a specialized spiral tip that simultaneously performs gentle vacuum-powered extractions while infusing active ingredients deep into the epidermis. Here’s how it works: as impurities and dead skin cells are gently ‘vacuumed’ out, a customized serum rich in antioxidants and peptides is delivered directly into the freshly opened pores. This dual-action process offers three key benefits:

  • Improved microcirculation – Enhanced circulation delivers more oxygen and nutrients to skin cells, accelerating the skin’s natural renewal process.
  • Boosted collagen synthesis – Peptides and other actives in the booster serums stimulate fibroblasts to produce new collagen types I and III, which are essential for skin firmness and elasticity.
  • Restoration of the skin’s hydrolipid barrier – Hyaluronic acid and antioxidants deeply hydrate the skin, reinforce its protective barrier, and defend it from free radical damage.

Red and Blue LED Light Therapy

HydraFacial also incorporates LED light therapy to support skin health at a cellular level.

Red LED light promotes skin healing and enhances collagen production, helping to reduce signs of aging. Blue LED light has antibacterial effects, making it particularly beneficial for acne-prone or inflamed skin.

Advantages Over Needle-Based and Laser Treatments

  • No needles, no pain, no bruising
  • Zero downtime – a true ‘lunch-break’ procedure
  • Safe for sensitive skin and all phototypes
  • Gradual, natural-looking ‘healthy glow’ effect
  • Suitable for year-round use

Who Is the Ideal Candidate for an Anti-Aging HydraFacial?

The anti-aging HydraFacial is an excellent choice for individuals over the age of 25 who are beginning to notice early signs of aging—such as fine lines, dehydration-related wrinkles, uneven texture, or a slight loss of skin firmness.

It’s also a great option for patients who wish to maintain the results of previous injectable treatments like fillers or Botox. HydraFacial enhances overall skin quality and can prolong the visible effects of those procedures.

For clients with busy schedules, this treatment is the perfect ‘lunch-break’ solution: fast, effective, and requiring no recovery time. It’s especially suitable for those with sensitive or reactive skin, as it doesn’t involve harsh acids or cause micro-injuries like more aggressive, ablative treatments.

Contraindications

This treatment should be avoided if you have active herpes, open wounds on the face, severe inflammatory acne, a recent sunburn, or a flare-up of rosacea.

If you’ve recently undergone a deep chemical peel, an intensive laser treatment, or received injectable procedures, it’s essential to consult with a dermatologist to determine the appropriate waiting period before starting a HydraFacial protocol.

Although pregnancy and breastfeeding are not absolute contraindications, it is recommended to speak with your physician beforehand to ensure the treatment is safe for both you and your baby.

How Many Sessions Are Needed for Optimal Results?

While a radiant complexion and improved skin tone are noticeable after just one session, true anti-aging benefits develop gradually through a series of treatments. An ideal schedule typically looks like this:

One session – delivers an instant ‘glass-skin’ glow, perfect before a special event or photoshoot.

Series of four sessions spaced 3–4 weeks apart – creates a cumulative lifting effect, visible skin tightening, and softening of fine lines.

Maintenance every 2–3 months – helps preserve elasticity and long-term anti-aging benefits.

Clinical results show up to a 20% increase in skin elasticity and approximately 15% reduction in the appearance of fine lines after the fourth treatment. Most notably, patients report a glowing, more even skin tone, improved texture, and reduced pore visibility.

A closeup of the doctor with a scalpel treating the woman's skin. Dermaplaning treatment.

Dermaplaning: The Go-To Treatment for Instantly Smooth, Irritation-Free Skin

Dermaplaning, a non-invasive form of mechanical exfoliation, has become one of the most popular and in-demand treatments for achieving smooth, radiant, and even-toned skin. This technique involves the use of a specialized scalpel to gently remove the outer layer of dead skin cells along with fine facial hair (peach fuzz). Once favored primarily by celebrities, dermaplaning is now a top choice for anyone seeking flawless skin and immediate results—without irritation or downtime.

What Is Dermaplaning?

Dermaplaning is a non-invasive cosmetic treatment that uses a sterile, specially designed surgical scalpel to gently scrape away the outer layer of dead skin cells and fine vellus hair (commonly known as “peach fuzz”), which can trap dirt and dull the skin’s natural glow. The result is skin that feels incredibly smooth, soft, and radiant.

Although the use of a scalpel might sound intimidating, the procedure is completely painless and extremely safe when performed by a trained aesthetician or dermatologist. The technique involves precise, controlled strokes of the blade held at a specific angle against the surface of the skin.

Unlike other exfoliation methods such as chemical peels or microdermabrasion, dermaplaning is purely physical—it doesn’t involve any chemicals or abrasive particles. That makes it suitable for a wide range of skin types, including sensitive skin.

How Is the Procedure Performed and How Should You Prepare

Clients are advised to avoid any harsh skin treatments or exfoliating products for at least one week before the session. It’s also important to limit direct sun exposure for a few days before and after the treatment to reduce the risk of hyperpigmentation.

The procedure begins with a thorough cleansing of the face to remove any makeup, impurities, and excess oil. Once the skin is clean, the aesthetician uses a sterile surgical scalpel and gently glides it across the surface of the skin at a precise 45-degree angle. The process is methodical and careful, typically starting at the forehead and moving downward.

During the session—usually lasting about 30 to 45 minutes—dead skin cells and fine facial hair are removed, revealing a fresher, more radiant layer of skin beneath. After the treatment, calming and hydrating serums or creams are applied to nourish and protect the skin. In some cases, a soothing mask may also be used for added hydration.

Dermaplaning is a painless procedure, and most people describe the sensation as light scraping, tickling, or a gentle tingling feeling.

Post-Treatment Skincare After Dermaplaning

Following your dermaplaning session, your skin may feel slightly sensitive, so it’s important to treat it gently and follow a few simple aftercare guidelines:

  • Avoid direct sun exposure: Since the top layer of skin has been removed, your skin is more vulnerable to UV damage. Be sure to apply a broad-spectrum sunscreen with SPF 30 or higher.
  • Skip harsh cleansers, toners, and exfoliants: These can irritate freshly treated skin and should be avoided for a few days.
  • Avoid heavy makeup: Let your skin breathe and heal by keeping it makeup-free for at least 24 hours post-treatment.
  • Hydration is key: Use nourishing moisturizers and hydrating serums to support skin recovery and maintain moisture balance.
  • Avoid active ingredients: Steer clear of retinols, acids (such as glycolic or salicylic), and other potentially irritating ingredients for at least 24 to 48 hours.
  • Don’t over-handle your face: Try to keep touching to a minimum to allow the skin to adjust and heal without unnecessary irritation.

How Often Should You Get Dermaplaning?

For optimal results, dermaplaning is typically recommended every 4 to 6 weeks. This timeframe allows your skin to fully regenerate while maintaining that smooth, radiant glow. Regular sessions not only help improve overall skin texture, but also enhance the absorption of skincare products and support a long-term youthful appearance.

Why Is Dermaplaning So Popular?

Instant Results with Zero Downtime

One of the biggest reasons dermaplaning has become so popular is its ability to deliver immediate results. Right after the treatment, the skin feels noticeably smoother, softer, and more radiant. Unlike more aggressive procedures, dermaplaning does not cause redness, swelling, or irritation—so you can return to your daily routine right away.

Improved Absorption of Skincare Products

Once the layer of dead skin cells is removed, your skincare products can penetrate more effectively. Moisturizers, serums, and anti-aging treatments work better and deliver greater benefits, allowing your skin to take full advantage of their active ingredients.

The Perfect Canvas for Makeup

Another reason clients love dermaplaning is its ability to create the ideal base for makeup. With dead skin and fine facial hair (“peach fuzz”) out of the way, foundation applies more evenly and smoothly—without clinging to dry patches or accentuating texture or pores.

Suitable for Nearly All Skin Types

Unlike some other treatments, dermaplaning is safe and effective for almost every skin type—including sensitive skin that may react poorly to more aggressive procedures like chemical peels or laser treatments.

Softens Fine Lines, Hyperpigmentation, and Acne Scars

With regular dermaplaning sessions, the skin’s natural cell renewal process is stimulated, helping to minimize the appearance of fine lines, shallow acne or chickenpox scars, and areas of uneven pigmentation. Over time, this treatment can help improve overall skin tone and texture, leaving your complexion smoother and more even.

Affordable and Accessible

Compared to many advanced aesthetic procedures, dermaplaning is a more affordable option—making it accessible to a wider range of clients who want visible results without a high price tag.

Who Is Dermaplaning Recommended For—and Who Should Avoid It?

Dermaplaning is suitable for nearly all skin types and is especially beneficial for individuals with normal, dry, combination, or sensitive skin who are looking to enhance texture and radiance quickly. It’s also an excellent option for those with fine facial hair (“peach fuzz”) who want smoother skin and a flawless makeup application.

However, this treatment is not recommended for individuals with active acne, eczema, psoriasis, or other inflammatory skin conditions. In such cases, alternative therapies may be more appropriate and safer for the skin’s current state.

Is Dermaplaning Safe?

Dermaplaning is considered an extremely safe procedure when performed by a trained and licensed professional. It’s important to choose a reputable medspa or dermatology clinic that adheres to strict hygiene protocols and uses sterile tools.

Most clients experience little to no irritation following the treatment. Temporary side effects may include slight redness, mild swelling, tingling, or tightness—all of which typically subside within 24 to 48 hours.

Will Hair Grow Back Thicker or Faster After Dermaplaning?

One of the most common misconceptions about dermaplaning is the belief that hair will grow back thicker, darker, or faster after the treatment. The truth is, dermaplaning does not affect the hair follicle—it only removes hair at the surface of the skin. Your facial hair will grow back at the same rate and with the same texture as before. In some cases, the regrowth may feel slightly different because the hair may grow back at a slightly different angle, but this is purely superficial.

So, if you’re looking for a quick, painless way to refresh your complexion, smooth out minor imperfections, and achieve an instant glow, dermaplaning could be the perfect treatment for you.

WhatsApp Image 2025-06-04 at 13.27.27

Ready for ‘pricking’? What to Do (and Not Do) Before and After Injectable Treatments

Injectable treatments, such as Botox or fillers, have become the gold standard in aesthetic medicine. They offer quick, effective results with minimal invasiveness, but the success of these procedures depends not only on the expertise of the professional and the quality of the products but also on how you prepare and care for yourself after the treatments. If you’re considering getting ‘pricked’ or have perhaps already scheduled an appointment, here are some tips on what you should and should not do before and after injectable treatments.

Pre-Treatment – Preparation is Key to Success

1. Consultation with a Specialist is Mandatory: The first step towards a successful treatment is a detailed consultation with an aesthetic specialist. This isn’t just a formality—the conversation allows the doctor to assess your health, understand your desires, and recommend the best treatment. Be honest about any medications you are taking, any allergies, or previous cosmetic procedures. For example, certain supplements or medications, like aspirin, can increase the risk of bruising.

2. Avoid Certain Substances: Seven to ten days before the treatment, stop taking non-steroidal anti-inflammatory drugs (like ibuprofen and aspirin) and supplements such as omega-3 fatty acids, vitamin E, or ginkgo, as they thin the blood and increase the chances of bruising.

Alcohol and nicotine are also on the ‘avoid’ list—alcohol can cause dehydration, and smoking slows down the healing process. Stop consuming alcohol at least 48 hours before the procedure, and if you smoke, try to reduce nicotine intake.

3. Hydrate and Care for Your Skin: Well-hydrated skin responds better to injections. Drink plenty of water and use moisturizing creams in the days leading up to the treatment. Avoid aggressive facial treatments, like chemical peels or laser procedures, at least two weeks before injections, as they can irritate the skin.

4. Plan the Right Timing: Injectable treatments are ‘lunchtime procedures,’ but that doesn’t mean you can immediately rush to an important meeting. Bruising, swelling, or redness might occur, so schedule the treatment when you have a few days without major social obligations. Also, if you plan to vacation in the sun, postpone the treatment—exposure to UV rays immediately after injections can cause complications.

Post-Treatment – Care for Yourself Carefully

  1. Follow Expert Instructions: Every injectable treatment comes with specific post-procedure instructions. For example, after Botox, avoid bending your head down or lying flat for 4-6 hours, as this can affect the migration of Botox, potentially causing undesirable effects. Strictly adhere to professional advice to ensure optimal results.
  2. Cool Down, But Gently: If you notice swelling or redness, cold compresses can help, but never apply them directly to the skin—use a soft towel for protection. Avoid pressing on the treated area, as this could shift the injected substance or cause additional irritation.
  3. Do Not Touch Your Face: For the first 24 hours, avoid touching the treated area, applying makeup, or washing your face aggressively. Bacteria from hands or products can cause infection at the injection site. After 24 hours, gentle cleansing and light moisturizing cream are allowed.
  4. Avoid Heat and Strain: Saunas, exercising, hot showers, and sun exposure are prohibited for at least 48 hours after treatment. Heat can increase swelling, and sweating during exercise increases the risk of infection. If you’re a gym enthusiast, take a break from intense workouts for a few days.
  5. Do Not Schedule Hair Appointments: Any hair treatment—dyeing, washing, and blow-drying—that requires an unfavorable head position immediately after a cosmetic procedure can compromise the results. (However, you can wash and style your hair yourself in the usual way—the next day after the procedure.)
  6. Avoid Massages: Full-body massages should be avoided for several weeks post-procedure. Why? Placing your face in a special hole on the massage table will cause unwanted pressure.
  7. Be Patient with Results: Results from Botox become visible after 3-7 days, while fillers often offer immediate effects, but the final appearance ‘settles’ after two weeks. If you notice asymmetry or something concerning, wait the recommended period before returning for correction—hasty interventions can worsen the situation.

The Golden Rule – Communication with Your Specialist

Whether this is your first or tenth injectable treatment, the key to success lies in trust and communication with your aesthetic specialist. If you have any doubts—from a strange feeling at the injection site to questions about long-term care—reach out to the clinic. Reputable clinics, like ours, are always there to provide support and ensure you look and feel your best.

Injectable treatments are a fantastic way to refresh your appearance and boost your confidence, but they require responsibility and commitment. With good preparation, careful post-treatment care, and collaboration with your aesthetic specialist, the results will be natural, long-lasting, and impressive.

Ready for your ‘treatment’? Schedule a consultation and start towards the best version of yourself!

How Botulinum Toxin Smooths Away Forehead Lines and Deep Frown Creases

How Botulinum Toxin Smooths Away Forehead Lines and Deep Frown Creases

Horizontal forehead creases and frown lines between the eyebrows are often the first signs of facial aging we notice when looking in the mirror. While these lines are fleeting expressions in our youth, over time, they become permanent companions. Factors such as sun exposure, stress, smoking, and dehydration further worsen the condition, making the wrinkles deeper and more noticeable.

When we talk, express surprise, frown, or raise our eyebrows, the frontalis muscle constantly contracts, creating folds in the skin. In our twenties and early thirties, these folds quickly smooth out thanks to abundant collagen and elastin in the skin. After the age of thirty, the production of these proteins declines, and facial expressions leave lasting ‘imprints’—deep creases that make the face look tired, angry, older, and harsher.

Botulinum toxin (best known by the brand name Botox) has been proven to be the safest and most effective non-surgical method to temporarily relax these muscles and smooth out wrinkles, often with stunning success.

Botulinum toxin works both preventively (by reducing frontalis muscle activity to prevent new deep wrinkles) and correctively. In younger patients, it can prevent the formation and deepening of wrinkles, while in older individuals, it significantly reduces existing lines, restoring a more youthful appearance.

How Does Botulinum Toxin Work on the Forehead?

Botulinum toxin type A (commonly known as Botox) is a purified neurotoxin refined to pharmaceutical-grade purity. When injected in minimal aesthetic doses at specific points, it temporarily blocks the connection between nerves and muscle fibers, preventing the excessive contraction of muscles responsible for wrinkle formation.

On the forehead, it is strategically injected into the frontalis muscle, preventing it from fully contracting. As a result, the muscle can no longer ‘crease’ the skin as strongly, leading to the smoothing out of folds and significantly reducing or even eliminating the appearance of horizontal forehead lines and frown lines between the eyebrows (also known as glabellar lines).

It’s important to note that with precise dosing and proper injection techniques, subtle softening is achieved without completely ‘freezing’ facial expressions — meaning the eyebrows can still move naturally, but without creating deep furrows across the forehead.

The Benefits of a Non-Surgical Forehead Lift with Botox

Unlike a traditional surgical forehead lift, which involves incisions and a lengthy recovery period, Botox offers a quick, non-invasive solution with virtually no downtime. The procedure typically takes just 10 to 15 minutes, and patients can return to their normal activities immediately afterward.

Results begin to develop within 3 to 5 days, with full improvement visible after about two weeks. Since there’s no need for deep anesthesia or stitches, there is no risk of scarring, and complications are extremely rare when the treatment is performed by a qualified professional.

Step-by-Step Treatment Process

  1. Consultation and Assessment:
    The specialist evaluates the depth of the wrinkles, muscle strength, and facial proportions to determine the ideal number of botulinum toxin units and the exact injection sites.
  2. Skin Preparation:
    After cleansing and disinfecting the skin, a numbing cream is applied to the forehead to ensure the procedure is completely comfortable for the patient.
  3. Injection:
    Using fine needles, botulinum toxin is injected into 4–6 pre-marked points across the forehead. Patients may feel slight pinching or stinging sensations, but the treatment is virtually painless.
  4. Finishing Touches:
    A gentle soothing gel may be applied to the skin after the injections. Patients are given detailed aftercare instructions, either verbally or in written form.

Since the entire procedure typically takes only 10–20 minutes, Botox treatments are often referred to as a ‘lunch-break procedure’ — meaning it won’t take much time out of your day.

What to Expect After the Treatment

Common side effects include mild redness, slight swelling, or minor bruising at the injection sites, all of which usually resolve within a few hours to a few days. Less commonly, some patients may experience mild headaches or a feeling of pressure.

For the first 4–6 hours after the treatment, it’s recommended to remain seated or upright and to avoid touching the treated areas. Strenuous physical activities, sauna sessions, and sun exposure should be avoided for at least 24 to 48 hours to prevent unwanted migration of the Botox and to minimize swelling.

Duration of Botox Effects on the Forehead and How to Maintain Results

The effects of Botox on the forehead typically last between 3 and 6 months, depending on the strength of the muscles and the patient’s metabolic rate. After that period, muscle activity gradually returns, and wrinkles may reappear in a softer, less pronounced form. With regular maintenance treatments, it is possible to keep the forehead smooth, prevent the deepening of lines, and even delay the formation of new wrinkles, especially in younger patients.

The treatment is not recommended for pregnant or breastfeeding women, individuals with neuromuscular disorders, or those allergic to any components of the product.

Botulinum Toxin for the Forehead Is the Best Solution — But What About Frown Lines?

Botulinum toxin can also effectively treat frown lines between the eyebrows, which often make us appear angry or tense. If the creases have become static (visible even without facial movement), Botox injections can be combined with hyaluronic acid fillers.

Botulinum toxin relaxes the muscles, while fillers restore lost volume. This combination can successfully smooth out deep frown lines, and results can last from 6 months up to a year.

Book a Consultation at Our Clinic and Take the First Step Toward Smooth, Radiant Skin!

WhatsApp Image 2025-05-25 at 13.31.40

Post-Treatment Care After Microneedling

Microneedling is one of the most popular aesthetic treatments that stimulates the skin’s natural regeneration and boosts collagen production, improving skin texture, reducing wrinkles, fine lines, hyperpigmentation, and scars, ultimately achieving a fresh, rejuvenated appearance.

However, like any treatment that involves microtrauma to the skin, microneedling requires careful post-treatment care to ensure optimal healing and maximize results.

Why Post-Treatment Care Is Important

After microneedling, the skin enters an active regeneration phase. The microscopic injuries created by the needles stimulate the body’s natural repair processes and increase the production of collagen and elastin. However, these tiny injuries also make the skin temporarily more sensitive, drier, and more prone to irritation and external aggressors.

Without proper care, these natural healing processes can slow down, and the results of the treatment may be less noticeable. Post-treatment care plays a crucial role in speeding up recovery, minimizing side effects, and ensuring that the new, regenerated skin becomes as healthy and resilient as possible.

How Long Recovery Takes

The full recovery period after microneedling typically lasts 3–5 days:

  • 24 hours after the procedure: significant redness, swelling, and petechiae are present.
  • 1–2 days after the procedure: mild redness, slight swelling, minor itching, dryness, and tightness of the skin.
  • 2–3 days after the procedure: redness becomes even lighter, and itching and tightness begin to subside.
  • 3–4 days after the procedure: dryness and skin flaking are common.
  • 5 days after the procedure: all symptoms usually disappear completely.

First 24 Hours – Initial Steps for Recovery

Follow your specialist’s instructions: Your aesthetician or dermatologist will provide specific post-treatment care instructions or recommend a set of products you can use immediately after the procedure. Typically, during the first 24 hours, it’s advised to rinse your face only with cool water and apply an antibiotic ointment if recommended.

Avoid touching your face: In the first few hours following microneedling, your skin is very sensitive and vulnerable to infection. It’s important to minimize contact with your face to prevent introducing bacteria.

Do not apply makeup: Since your pores are temporarily more open, applying makeup can cause irritation or clog the pores. It’s best to avoid any type of makeup during this time to allow your skin to calm down and heal naturally.

In the Next 2-3 Days – How to Continue Caring for Your Skin?

In the hours and days following the procedure, your skin continues to heal, so it’s important to follow these guidelines:

1 – 2 days post-procedure, it is essential to use a neutral, regenerative cream that helps reduce redness and sensitivity, preparing the skin to accept active ingredients from subsequent care products.

On the 3rd day post-procedure, you can gradually reintroduce your regular home skincare regimen, using gentle cleansers (free from harsh chemicals or perfumes), a hydrating cream or hyaluronic acid serum, and makeup may be applied.

Hydration is crucial – using serums and creams rich in hyaluronic acid, panthenol, ceramides, and vitamin E can aid in restoring the skin’s barrier function. Proper hydration not only soothes the skin but also supports the collagen synthesis process.

Sun protection: Post-microneedling, the skin is more sensitive to UV rays. Regular application of SPF (at least 30, preferably 50) is necessary, even on cloudy days. Avoid direct sunlight and tanning beds until the skin has fully recovered.

Avoid hot showers and physical exertion for the first 3-5 days: Intense heat (such as from saunas or hot baths) and increased sweating can further irritate and weaken the skin. It is advisable to refrain from these activities in the initial days.

3 – 5 days post-microneedling, avoid waxing, laser hair removal, or hair dyeing.

How to Maintain Results in the Long Term?

After the initial days have passed and the redness and sensitivity have subsided, it is still necessary to apply a targeted care regimen to maximize the benefits of the microneedling procedure:

1. Introduction of gentle, active ingredients: About a week after the treatment, when the skin has stabilized, you can begin to slowly introduce products like retinol or acids that aid in regeneration and maintaining skin quality. However, it is always best to consult with a professional about the exact timing and types of products.

2. Regular application of SPF protection: Harmful UV rays can diminish the effects of microneedling and accelerate skin aging even in the long term, so continue applying sunscreen with a protective factor throughout the year.

3. Combination with other treatments: Microneedling often combines well with PRP (platelet-rich plasma treatment) or mild chemical peels for additional benefits. Plan such combinations or upgrades in consultation with your aesthetic expert.

4. Proper nutrition and internal hydration: A diet rich in antioxidants, vitamins, and minerals, as well as adequate water intake, maintains skin hydration levels and supports renewal processes.

5. Regular check-ups: Depending on your skin issues and desired results, it may be recommended to repeat the microneedling treatment every 4 to 6 weeks. By having regular exams and check-ups at your aesthetic clinic, you ensure continuous care for your skin and adjustments to your care plan based on the condition of your skin.

Microneedling can drastically improve the appearance and texture of your skin, but complete success requires patience, adequate care, and smart post-procedure protection. A long-term skincare routine, aligned with expert advice, will further strengthen and prolong the achieved results.

Tips and Aftercare for Long-Lasting Botox Effects

Tips and Aftercare for Long-Lasting Botox Effects

Due to its ability to soften mimic wrinkles and rejuvenate facial appearance, Botox injections have become one of the most sought-after anti-aging treatments, earning the trust of millions worldwide. Their effect, especially in terms of reducing forehead wrinkles, frown lines between the eyebrows, and crow’s feet around the eyes, provides a youthful look with minimal recovery time.

However, to ensure that the results last longer and remain natural, the aftercare following Botox application is just as crucial as the procedure itself.

Understanding Botox Treatments

Botox (Botulinum toxin type A) temporarily blocks neuromuscular activity, preventing excessive muscle contractions. Thus, wrinkles that arise from repeated mimic movements—such as frown lines or fine lines around the eyes—become less noticeable or disappear altogether, giving the skin a smoother and more rested appearance. Typically, the initial effects of a Botox treatment can be noticed after 3 to 5 days, while the full effect develops over 10 to 14 days.

Why Is Post-Treatment Care Important?

Although the application process itself is simple and lasts only a few minutes, with minimal recovery time, it is the habits and proper care after the procedure that play a crucial role in achieving long-lasting results. On average, the effect of Botox lasts from 3 to 6 months, depending on individual factors such as muscle activity, metabolism, and lifestyle habits.

However, proper behavior immediately after the procedure and during the first few weeks can extend this period, ensure that the achieved result is as natural as possible, help in alleviating any potential side effects such as redness, swelling, or mild discomfort, and also contribute to maintaining skin integrity and reducing the formation of new wrinkles.

Immediately After Botox Treatment – What Can You Expect?

Immediately after Botox injections, you may notice slight redness, possible bruising, and swelling at the injection sites. Additionally, some patients may experience a mild tightening sensation or discomfort in the treated areas, but this is part of the normal skin reaction. Less commonly, headaches or a feeling of pressure may occur, especially when the forehead and area between the eyebrows are treated.

These reactions are temporary and usually subside within a few hours to a couple of days. During this period, it is important to follow the guidelines provided by your aesthetic specialist to minimize any adverse effects, prevent the migration of Botox to incorrect areas, and ensure optimal distribution of the active substance in the muscles.

Tips for the First 24 Hours

Avoid touching treated areas: Do not massage, press, or rub the areas where injections were applied. This could lead to undesirable diffusion of the substance into surrounding muscles and reduce the effect in the desired zones. It is crucial not to massage or touch the treated region for the first 4 to 6 hours post-treatment, though some doctors advise up to 24 hours if at all possible.

Stay upright for the first 4 hours: It is recommended not to lie down or bend your head forward for the first few hours after treatment (at least the first 4 hours). This minimizes the risk of Botox migration, which can cause unwanted effects such as asymmetry or drooping eyelids.

Avoid intense physical activity: For the first 24 to 48 hours, it is advised to avoid exercising and other activities that increase your heart rate and blood pressure. Intense physical activity—like running, weight lifting, or vigorous aerobic exercises—can lead to increased circulation and exacerbate swelling in the initial hours.

Another reason is that high-intensity movement during exercise can cause the injected Botox fluid to shift to other muscles, an undesirable outcome as previously mentioned.

It is recommended to rest or take gentle walks, but refrain from anything that excessively sweats you or strains your facial muscles.

Avoid alcohol, saunas, and hot showers: Increased circulation due to consuming alcohol or exposure to high temperatures (e.g., saunas, hot showers, steam baths) can cause an increased blood flow to the face and lead to the appearance or worsening of bruising or swelling.

It is very important to adhere to these recommendations for the first 24 hours after treatment, although some doctors suggest a couple of days, if possible.

Limit sun exposure: It is recommended to avoid direct sunlight and tanning beds for at least a few days after the treatment.

Facial care and makeup: After 4 hours from the Botox treatment, one can wash their face and apply gentle skincare creams. Regarding makeup, it’s best to wait at least 12 hours post-procedure, although it is warmly recommended to do it the next day.

Just ensure in the first 24 hours to avoid applying significant pressure and rough movements to the regions where Botox was injected, as well as intense cosmetic treatments and similar activities.

Care Recommendations for the Coming Days

  1. Maintain Normal Facial Expressions: While previous recommendations suggested making certain facial expressions to ‘distribute’ Botox, current research shows that excessive mimicking doesn’t bring additional benefits. It’s sufficient to behave normally—smiling, talking, and daily facial expressions are entirely adequate for the Botox to distribute properly within the muscle fibers.
  2. Gentle Cleansing and Hydration: Use mild cleansers and moisturizers that do not contain harsh ingredients. Drink plenty of water to maintain hydration and help your body respond more quickly to the treatment.
  3. Avoid Aggressive Exfoliation: For the next few days, it’s best to avoid chemical or mechanical exfoliations that might further irritate the skin and interfere with the regeneration process.
  4. Use Cold Compresses or Mild Gels: If you notice slight swelling or bruising, applying a cold compress can help. Be careful not to press too hard; instead, gently place a cold, soft towel or gel pack. This reduces swelling and speeds up the disappearance of bruises.
  5. Don’t Skip SPF Protection: Although Botox itself does not make the skin more sensitive, treated areas may be more susceptible to UV damage. Use creams with SPF 30 or higher to protect your skin and prevent premature aging.
  6. Follow Expert Instructions: If your doctor has recommended certain products or measures, strictly adhere to these guidelines. Regular check-ups and possible adjustments to your care plan can ensure that the results of your Botox treatment last as long as possible.

Additional Tips for Long-Lasting Botox Effects

Quality sleep, a balanced diet, and regular physical activity have a significant impact on the overall condition of the skin. Avoid smoking and excessive alcohol consumption, as these factors accelerate aging and can reduce the longevity of Botox effects.

Do not skip regular check-ups. Consult with your aesthetic expert about the schedule for follow-up treatments. The effects of Botox gradually diminish, so it is advisable to repeat the treatment when mimic wrinkles begin to reappear.

Fillers – The Art of Balance, How to Achieve a Natural Look

Fillers – The Art of Balance, How to Achieve a Natural Look

Dermal fillers have become an indispensable tool in combating signs of aging, loss of volume, and facial asymmetry. Millions of men and women worldwide opt for this treatment because it provides quick and visible results for filling wrinkles, defining and accentuating facial contours, restoring lost volume, and rejuvenating the skin’s youthful glow.

The popularity of dermal fillers stems from the fact that the treatment is minimally invasive, with a short recovery period and effective outcomes. However, one of the most common questions is: ‘How to find the right balance?’ Excessive use or too much filler can lead to an exaggerated, artificial appearance, while too little may not deliver satisfactory effects.

What Are Dermal Fillers, and What Are They Used For?

Dermal fillers are injectable preparations most commonly based on hyaluronic acid—a substance that naturally occurs in our bodies and is responsible for water retention and maintaining skin elasticity. Their primary function is to retain water, supplement lost volume, and thus provide a ‘fuller and tighter, and consequently, more youthful facial appearance. Common areas for filler application include the lips, cheeks, nasolabial folds, and jawline contours.

Why Is Proper Dosage So Important?

Most people do not want to look like a ‘different person’ after using fillers. The goal is to preserve the basic features of the face and only soften or correct existing imperfections. By overdoing the dosage of fillers or injecting them in the wrong places, one can easily create an overblown look—affecting what is often referred to as ‘overfilled syndrome.’ Such results are not only aesthetically displeasing but can also appear unnatural and even lead to asymmetry, disturbing the natural proportions of the face.

On the other hand, using too little filler might not produce a pronounced effect, especially in the case of deep wrinkles, deep nasolabial folds, or significant volume loss in the cheeks. Consequently, the patient, despite the investment of money and time, does not achieve the desired results.

Additionally, the excessive use of fillers or improper injection techniques increase the risk of complications, such as unevenness, lumps, or even the rare case of blood vessel obstruction. An adequate approach to dosing and application technique safeguards the patient’s health and minimizes the likelihood of side effects.

Key Factors for Determining the Optimal Dosage

1. Individual Anatomy and Age: Each face is unique, and so are its needs. Factors such as the shape of the face, the amount of natural volume, skin thickness, and local characteristics significantly impact the amount of filler needed. People with prominent jawbones, deep scars, or significant loss of fat tissue may require more fillers. Conversely, a smaller intervention may be sufficient for younger individuals who just want to enhance existing contours. Age also plays a role: as years pass, the loss of volume and elasticity increases, and thus the needed amount of filler might be greater.

2. Skin Quality and Lifestyle: Individuals with good genetics and healthy habits (proper diet, hydration, sun protection, non-smoking) often have more elastic skin that responds better to fillers, achieving a longer-lasting and more subtle effect. Conversely, sun exposure, smoking, and dehydration can accelerate skin aging and require additional doses of fillers for the same result.

3. Treated Region: The dose of filler varies depending on the part of the face being treated. For example, the lips and nasolabial folds are more sensitive and require a smaller amount of filler, while areas such as the cheeks or jawline often use a greater amount to compensate for lost volume.

4. Expected Result: It is important to define what the patient wants: whether they are only slight corrections and subtle changes, or a more drastic transformation which will, of course, usually require a greater amount of fillers.

5. Quality of Fillers and Injection Technique: There are numerous variations of fillers on the market today that differ in density, viscosity, and duration. Dense and highly cross-linked fillers are suitable for deeper corrections and building volume, while softer and less dense fillers are used for finer lines or sensitive areas, such as the lips. An experienced specialist will select the appropriate product and inject it at the optimal depth, ensuring a natural and stable effect.

How to Recognize the Right Amount?

Consultation with an Expert

The first and most important step is an honest conversation with a licensed expert specialized in aesthetic medicine. An experienced professional will assess the shape and proportions of the face, listen to the patient’s desires, and based on this, suggest the amount and type of filler that will yield the best results.

Gradual Volume Addition

 Instead of injecting a large amount of filler all at once, the recommendation is to gradually dose with follow-up reviews and corrections as needed. This approach allows for achieving the most natural effect and prevents the face from appearing overdone or asymmetrical.

‘Less is More’ Approach

The common motto of modern aesthetic medicine is: ‘fillers should enhance beauty, not reshape it.’ When a patient looks rejuvenated, fresh, and rested after treatment, without obvious signs of intervention, it is known that the ideal balance has been achieved.

Maintaining Results and Preventing Overuse

The duration of fillers varies, but the effects typically last from 6 to 12 months on average. After this period, patients may notice a gradual decrease in volume. Rather than rushing to immediately refill, it is advisable to schedule a follow-up consultation with your doctor to evaluate the condition and determine the timing for a supplementary treatment. This way, the face will always look natural, and the effects will be in harmony with the changes that come with aging.

Integrating filler injections into an overall skincare routine—through proper hydration, sun protection, and moderate use of active ingredients—further extends the effects and ensures that your skin remains fresh, youthful, and naturally beautiful.

ThermiSmooth Face - A Non-Invasive Path to Youthfully Tightened Skin

ThermiSmooth Face – A Non-Invasive Path to Youthfully Tightened Skin

In searching for procedures that can tighten skin and slow its aging painlessly and effectively, many are increasingly turning to non-invasive treatments that promote natural tissue regeneration. One of the newest and most popular procedures in this field is ThermiSmooth Face. This treatment, based on controlled radio frequency (RF), allows for the rejuvenation of the skin on the face, neck, and décolleté without needing scalpels, needles, and long recovery periods.

What is ThermiSmooth Face?

ThermiSmooth Face is a non-invasive aesthetic treatment that uses targeted low-frequency radio frequency (RF) energy to rejuvenate and tighten facial skin. The basis of the procedure lies in the use of high-intensity, focused ultrasound or RF waves that reach into the deeper layers of the skin—particularly the SMAS layer (superficial muscular aponeurotic system), where the muscles and connective tissue are located.

While many anti-aging treatments rely on chemical or mechanical methods, ThermiSmooth Face achieves a lifting effect through heat—by heating, it stimulates fibroblasts to increase collagen production, making the skin tighter, more elastic, and fresher in appearance.

Compared to older radio frequency technologies, ThermiSmooth Face has been enhanced to continuously monitor and control the temperature during treatment, further improving safety and comfort for the patient.

ThermiSmooth Face treatment has a dual function: it immediately tightens existing collagen through controlled thermal stimulation and, in the long term, encourages the creation of new, healthier collagen and elastin, resulting in a natural and lasting lifting effect.

How Does ThermiSmooth Face Work?

RF waves work by penetrating the skin’s surface and heating the deeper layers of the dermis. When the tissue reaches a certain temperature (usually between 42°C and 45°C), it leads to an immediate tightening (contraction) of collagen fibers. At the same time, the body initiates a natural regeneration process, signaling for the production of new collagen and elastin. In the long run, this mechanism leads to a gradual but noticeable effect of tightening, evening out the skin tone, and reducing wrinkles.

The heat delivered during the treatment is not aggressive, and thanks to safety mechanisms, the skin remains protected from overheating and potential adverse reactions. Patients usually feel a pleasant, diffused warmth, similar to a mild hot stone massage, as the device’s probe moves evenly across the face.

Which areas can be treated with this treatment?

ThermiSmooth Face is most commonly used for:

Mildly sagging skin on the face and neck: For individuals who notice the first signs of sagging under the jawline, on the cheeks, or on the neck.

Fine lines and wrinkles on the forehead, around the eyes, and lips: The treatment can successfully soften so-called ‘worry lines’, ‘frown lines’, drooping eyelids, ‘crow’s feet’, ‘laugh lines’, or nasolabial folds around the lips, thus giving the face a more rested appearance.

Who Is ThermiSmooth Face Intended For?

ThermiSmooth Face is ideal for those who notice the first signs of aging—fine lines, sagging skin, or loss of tone—but are not ready for invasive methods such as a facelift. It is especially popular among individuals in their thirties and forties, when the skin begins to lose elasticity but is still responsive enough to react to stimulation. However, it is not limited to this age group—it is also often chosen by those who want preventive action or simply wish to refresh their appearance before an important event.

The treatment is also an excellent choice for those with sensitive skin around the eyes, where dark circles, fine lines, or slightly sagging eyelids often appear. Additionally, it can help improve facial contours, such as defining the jawline or reducing a slight double chin. In short, if you are looking for a subtle but noticeable change without any risks, ThermiSmooth Face is the right ally.

The treatment is not suitable for people with more significant excess skin, who might benefit more from surgical facelifting. Also, individuals with cardiac issues, implanted pacemakers, or active skin infections should consult with a doctor to assess the safety of the procedure.

What You Can Expect During and After the Treatment

One of the biggest advantages of the ThermiSmooth Face treatment is its simplicity. The entire procedure lasts between 20 and 60 minutes, depending on the extent of the treated area.

After a detailed consultation with an expert, during which the condition of the skin is assessed and treatment goals are set, skin preparation follows, which includes thorough cleansing and the application of a contact gel. Then, the RF or focused ultrasound probe is placed on the targeted areas.

The aesthetic specialist uses gentle or circular movements with a special device (handheld applicator) that glides over the skin surface, gently heating it. The sensation of heat is usually pleasant and can be compared to the feeling of a warm massage. Most patients do not feel discomfort, and the temperature and intensity of the treatment are continuously adjusted to ensure maximum comfort. As the skin temperature reaches the target value, the Thermi RF computer automatically adjusts the power of the energy to provide precise heating.

Immediately after completing the ThermiSmooth Face treatment, you may notice slight redness and a sensation of warmth in the treated area, which usually disappear within a few hours. Thanks to the non-invasive nature of the treatment, you can immediately return to your daily activities.

The treatment is typically repeated once a week, in a recommended series of 3 to 6 sessions, to achieve optimal results, but the schedule may vary depending on the condition of the skin and expert recommendations. The achieved results can last up to several years, especially if maintained with periodic sessions.

When to Expect Results and How Long Do They Last?

The initial effects of the ThermiSmooth Face treatment can be seen after the first or second session, primarily as tighter and more radiant skin. However, the true, longer-lasting results are usually observed only after several weeks or even a month, when collagen regeneration intensifies. This process is gradual, allowing for a natural effect without sudden, drastic changes.

The duration of the results depends on lifestyle, genetic predisposition, and the age of the patient, but generally, the effects can be expected to last from 6 to 12 months. Regular maintenance treatments (once every few months) can extend the achieved results and keep the skin in the best possible condition.

Benefits of ThermiSmooth Face Treatment

  • Non-invasive: No cuts, needles, or need for anesthesia.
  • No downtime: You can return to your daily activities immediately after the treatment.
  • Safety: The treatment is extremely safe, with minimal risk of side effects.
  • Universality: Suitable for all skin types and tones.
  • Gradual, natural results: Changes appear gradually, making the results subtler and more natural.
  • Improved skin quality: Besides tightening, the treatment also improves skin texture, giving it a healthier and more radiant appearance.
Swelling after Hyaluronic Acid – How Long It Usually Lasts and How to Reduce It

Swelling after Hyaluronic Acid – How Long It Usually Lasts and How to Reduce It

In recent years, hyaluronic acid (HA) has become one of the most popular and reliable treatments for rejuvenation. Whether used for dermal fillers or joint therapy, this natural substance provides immediate and long-lasting benefits. However, even though these treatments are generally safe and yield remarkable results, like all cosmetic procedures, hyaluronic fillers come with potential side effects, one of the most common being swelling.

Swelling is a common occurrence and often an expected part of the healing process after hyaluronic filler treatments. While it may seem concerning, in most cases, swelling is actually a natural skin reaction to the injection and tissue adaptation. This is why it’s important to understand why it occurs, how long it usually lasts, and what practical steps you can take to reduce it.

Why Does Swelling Occur after Hyaluronic Filler Treatments

The very act of injecting and introducing fillers into the skin constitutes a micro trauma to the tissue. This trauma, albeit minimal, triggers an inflammatory response from the body. Swelling occurs as a result of increased permeability of blood vessels and the accumulation of fluid in the treated area.

This process is part of natural healing— the body attempts to protect the area and starts regeneration, resulting in temporary water retention. The inflammatory process, though necessary for healing, can lead to swelling, redness, and mild sensitivity.

How Long Does Swelling Usually Last?

The duration of swelling can vary from person to person, but in most cases, swelling after hyaluronic fillers lasts from a few days to one week. The most pronounced swelling typically occurs within the first 24 to 48 hours after treatment, after which it gradually begins to subside. In some cases, particularly with treatments in sensitive areas like the lips or around the eyes, swelling may last a bit longer.

Typically, by the end of one week, most of the swelling should have subsided. However, some minor residual swelling can persist up to two weeks, especially in areas that are more sensitive or have received a larger amount of filler.

Thus, to see the “true” results and assess whether the volume is ideally distributed, it is recommended to wait at least two weeks before making a final judgment about the need for additional touch-ups or corrections.

Factors Affecting the Duration of Swelling

Several factors can influence how long swelling lasts after filler injections:

  1. Injection Technique: A precise injection technique, using a cannula instead of a traditional needle, can reduce tissue damage and consequently swelling. Techniques that involve deeper injections or more punctures often result in more significant swelling. An aesthetic expert who carefully plans the injection points and the depth of the fillers can significantly minimize adverse reactions.
  2. Amount of Filler Injected: Larger amounts of filler often lead to more swelling. Properly determining the amount, based on individual needs, is crucial for optimal results.
  3. Treated Area: Regions such as the lips, eyes, and neck have richer vascularization and may be more sensitive, so swelling can be more pronounced than on the cheeks or jawline.
  4. Individual Sensitivity: Each person has a unique immune response. Some naturally have a stronger inflammatory reaction, while others absorb excess fluid more quickly and efficiently.
  5. Brands and Formula of Hyaluronic Acid: Different brands and different products with hyaluronic acid have different consistencies, molecular weights, and formulations, so some may cause more swelling than others.
  6. Use of Additional Treatments: Combining fillers with other aesthetic procedures (such as HIFU, PRP, or even a light chemical peel) can, in some cases, increase swelling but often provide a synergistic effect on skin regeneration.

How to Reduce Swelling after Hyaluronic Fillers

Although swelling is usually a temporary issue, there are steps you can take to minimize it and speed up the healing process.

  • Cold Compresses: Applying cold compresses to the treated area can help constrict blood vessels and reduce the amount of fluid accumulating around the injection site. You can use an ice pack or wrap ice in a cloth and gently press it against the skin. Be sure to avoid direct contact with ice to prevent skin damage.
  • Avoid Touching the Treated Area: Resist the urge to massage or press on the treated area, as this can cause further irritation and potentially displace the filler.
  • Avoid Intense Physical Activity: For the first 24 to 48 hours, avoid strenuous physical activities and exercise as they can increase blood flow to the face and potentially worsen swelling and prolong recovery.
  • Sleep with Your Head Elevated: Using extra pillows when sleeping reduces fluid retention in the upper body, which can help reduce swelling more quickly.
  • Hydration and Diet: Drink plenty of water and maintain a healthy diet rich in antioxidants. Good hydration allows the body to more quickly eliminate excess fluid, while antioxidants help reduce inflammatory processes.
  • Avoid Alcohol and High Salt Intake: Alcohol can further dehydrate the skin and exacerbate swelling, while excessive salt intake contributes to water retention in the body.
  • Use Mild, Soothing Creams: After treatment, using soothing creams with ingredients such as allantoin, panthenol, or niacinamide can help calm the skin and reduce swelling. Also, a high SPF sunscreen is mandatory, as new skin is extremely sensitive to UV rays.
  • Be Mindful of Medications and Supplements: Avoid medications like aspirin and ibuprofen, which can increase the risk of bleeding and swelling. Discuss safe alternatives for pain relief with your doctor.
  • Follow Expert Advice: Always adhere to the instructions given by your aesthetician. If swelling lasts longer than expected or if pain, redness, or unexplained discomfort occur, be sure to consult a professional for further assessment.

When to Be Concerned About Swelling

While mild swelling is common, there are certain cases when you should contact your doctor:

  • Excessive Swelling: If the swelling continues to worsen instead of improving over the first few days, this could indicate an allergic reaction, infection, or other complications.
  • Severe Pain: Some discomfort is expected, but if the area becomes painful, hot to the touch, or if you notice signs of infection (such as pus), seek medical attention immediately.
  • Lumps or Bumps: If you notice firm lumps or bumps under the skin that do not dissipate after a few weeks, this may be a sign of uneven distribution of hyaluronic acid or an issue with the injection technique.
Chemical Peels - How to Achieve Fresh and Youthful Skin

Chemical Peels – How to Achieve Fresh and Youthful Skin

Chemical peel is a powerful and proven tool in the fight against signs of aging and skin damage. This treatment, which has been successfully used for decades, allows for the removal of the damaged outer layer of skin, thereby stimulating regeneration and the creation of a new, healthier epidermis. Thanks to innovations and new types that have emerged, chemical peels have recently risen to the top of the list of the most effective treatments in the world of beauty.

What is a Chemical Peel?

A chemical peel is a cosmetic procedure in which specialized chemical solutions, most commonly acids, are applied to the skin. These act by selectively removing damaged and dead skin layers. This controlled exfoliation allows a new, healthier layer rich in collagen and elastin to emerge in place of the removed cells. The result is smoother, more even, and more radiant skin with fewer wrinkles and texture irregularities.

There are different types of chemical peels, classified according to their depth of action:

•  Superficial (light) chemical peels: These use mild acids such as glycolic or lactic acid and only affect the very top layer of the skin. These peels are gentle, suitable for refreshing the complexion, minimally irritate the skin, and have a very short recovery period.

•  Medium chemical peels: Typically, acids such as trichloroacetic acid (TCA) in appropriate concentrations are used. These peels reach the upper part of the dermis, allowing for more effective resolution of issues such as pigmentation, uneven skin tone, and deeper lines.

•  Deep chemical peels: Stronger chemicals like phenol are applied and penetrate into the deeper layers of the dermis. Although they provide remarkable results, they require strict supervision, a longer recovery period, and are usually administered in medical settings.

How Does a Chemical Peel Work?

The basic principle of a chemical peel is the controlled removal of damaged skin cells to stimulate natural regeneration. When a chemical solution is applied to the skin, it works in the following ways:

  • Removing Dead Cells: Acids dissolve the bonds between cells in the epidermis, quickly removing old and damaged cells.
  • Encouraging Skin Renewal: After the removal of the surface layer, the skin begins the regeneration process, forming a new layer of cells that are healthier, thicker, and richer in natural moisturizing components.
  • Stimulating Collagen Production: A chemical peel causes a mild inflammatory reaction that encourages fibroblasts to produce more collagen and elastin, i thereby mproving the firmness and elasticity of the skin.

This process not only enhances the texture of the skin but also evens out the complexion, reduces pigmentation irregularities, and diminishes the visibility of wrinkles.

What Issues Does a Chemical Peel Address?

A chemical peel is an exceptionally versatile treatment and can be applied to various cosmetic and dermatological issues:

  • Wrinkles and Fine Lines: By removing damaged epidermis, the peel reduces the depth of wrinkles, making the skin appear smoother and younger.
  • Uneven Complexion and Hyperpigmentation: Sunspots, melasma, and post-inflammatory hyperpigmentation can be significantly reduced as the removal of the damaged layer reveals new, even cells.
  • Acne Scars: Superficial and medium-depth peels can improve skin texture, level out scars, and make the skin softer.
  • Dry and Dehydrated Skin: By removing dead cells, the peel allows better absorption of moisturizing treatments and serums, restoring natural hydration to the skin.
  • General Renewal and Rejuvenation: A chemical peel is an excellent way to “reset” the skin, enhance its texture, and return a youthful glow.

How Is a Chemical Peel Performed?

Before you decide on a chemical peel, it is essential to consult with a dermatologist or aesthetic expert who will assess your skin’s condition and sensitivity. Based on the patient’s results and goals, the specialist will select the appropriate type and concentration of the peel to achieve optimal results with minimal side effects.

Skin preparation follows. Before the treatment, the patient will receive instructions typically including avoiding aggressive exfoliations, sun exposure, and the use of strong products several days before the treatment. On the day of the procedure, the skin is thoroughly cleaned and prepared for the application of the chemical solution.

The treatment itself involves applying the chemical solution to the skin in controlled layers, and the duration of action is carefully monitored. The patient may experience mild stinging, warmth, or discomfort, which is a normal reaction to the activity of the acids.

After the action time has elapsed, the chemical solution is neutralized or washed off, and a soothing agent, moisturizer, or serum is applied to calm any irritations and promote regeneration.

Post-treatment care after a chemical peel is of utmost importance. After the treatment, the skin may be red, sensitive, and dry, and in the following days, there may be peeling and flaking, the intensity of which depends on the depth of the peel. During this time, patients are advised to use mild moisturizing and soothing creams, and to strictly avoid direct sunlight and always use SPF protection. The recovery period varies – with superficial peels, effects subside immediately or within one to two days, while with deeper peels, they can last up to a 7-14 days.

How Many Treatments Are Needed for Perfect Skin?

The optimal number of chemical peel treatments needed to achieve visible improvement in skin appearance depends on the individual’s skin condition, patient goals, and the type of peel used, but typically, a series of 3 to 6 sessions spaced several weeks apart is recommended to allow for complete regeneration. With regular care and maintenance, such as repeating the peel once or twice a year, results can be maintained long-term, providing the skin with a fresh, even, and youthful complexion.

Schedule a Free Consultation

Our goal at Bodyvine is to tailor the peel treatment to your skin issues while creating an environment where you can feel at home and freely express your desires, as well as any doubts and concerns!

We offer a wide range of chemical peels, from classic “lunchtime” peels (excellent for all skin types with minimal or no recovery time) to medical peels that address deeper signs of sun damage and advanced anti-aging treatments.


Call us and schedule your free consultation today.